Vegan's Nightmare ~ My Scones
 This scone recipe is not for the faint of heart. I titled it a "Vegan's Nightmare" because, I will admit, they have a lot of dairy and eggs in them. I love vegan baking though and find it be wonderful and much more healthy. However, now and then I like to make these. The ingredients are super important in terms of quality because there aren't a lot of ingredients soooo, you have to make sure they are good ones!
This was one of my favorite things to make in Pastry School, in fact it was for most of the students. They were so decadent and really changed the term "scone" in my mind. The scones I had always eaten were very dry and crumbly, unlike these which contain a lot of heavy cream, making them more of a cream scone. There are a lot of healthier versions out there but like I said, this is a splurge for the occasional indulgence.
When I sold my baking at the Farmer's Market, my scones were my best sellers because it was a nice little pastry for breakfast that one could munch on while shopping. Because of where we live, there is such a variety of fruit - you can make so many different flavors. Seems like the best sellers were Fresh Raspberry, Cranberry Orange (for fall) and Blueberry Lemon. Another nice one for fall was my Apricot Walnut White Chocolate. Well, that's enough history so without further ado let us begin....
The photo way above shows the ingredients needed to make your scones. I halfed the batch for today but normally you will get 12 scones from 1 recipe. On a side note, you can freeze the unbaked scones and then transfer them right to the oven when you are ready to bake off.
Ingredients: 4 Cups AP Flour
1/2 Cup Sugar
2 Tbsp Baking Powder
Set this aside...
Mix the following together with a whisk: 4 eggs (very cold)
1 and 1/2 Cups Heavy Whipping Cream
1 Tbsp Pure Vanilla Extract
Set this aside....
You will then take 1 cube of very, very cold butter. I prefer to use Kerry Gold Irish. Never substitute margarine on this.
Cut the butter into very small pieces with a very sharp knife and add to your flour mix. You will want to use a pastry cutter to cut the butter into the flour. You are going to want to have small pieces of butter visible by the time you are done.
If you mix in the butter too small, the butter will just melt and run out of the scone while you are baking them. Instead, you want pieces so the butter will actually rise and give the scone a light interior crumb. The last thing you want are tough scones and overprocessing can do that. See the photo below to give you an idea of the appearance the dough should have.
 Here is my egg/cream mix - you are going to add this to your flour/butter mix...
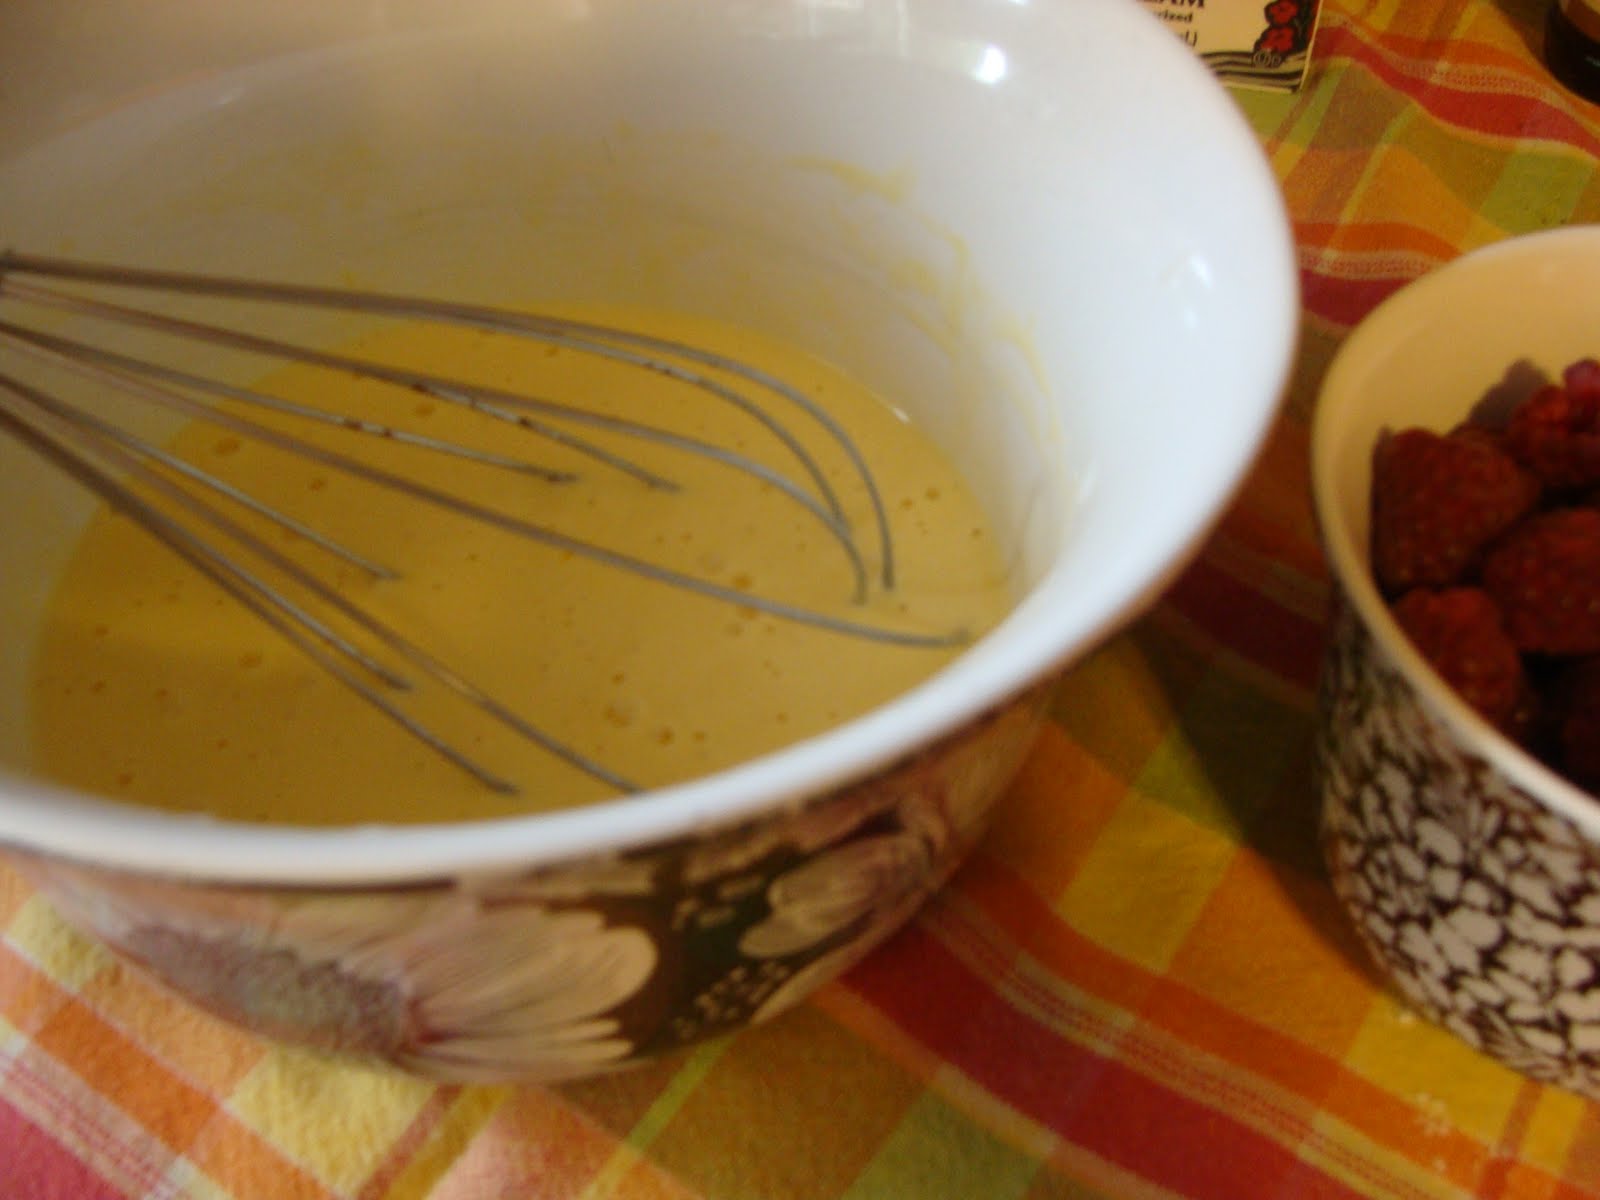 Blend very gently with a rubber spatula by folding the flour and milk mix over each other until it comes together. Again, really watch your hand on it - very gentle so you don't overwork the dough. The secret to good scones is great ingredients and a light hand. Now, add your fruit. Generally I use about 1 and 1/2 cup. Today I'm using fresh raspberries because there is a lovely fall harvest going on right now. Once again, I use the spatula to fold in the fruit.
So the next thing you want to do is place your dough onto a floured work area. Be fairly generous with your flour as the dough really likes to stick. If you find the dough too sticky add a little extra flour and use your pastry cutter to help control the dough. Too dry? Add a bit more heavy cream. Gently shape your dough into a round as seen below and pat down so that it is about 1 inch thick. Now, generously brush your dough with more heavy cream (see what I mean about the dairy?!) and sprinkle heavily with either Turbinado sugar (which is a raw,coarse sugar that is excellent) or your granulated. Both provide a bit of crunch to the surface of the baked scone. Using a big ol' knife, cut your scones as shown below - into wedges. By now you are going to want your oven at 375 degrees. You are going to line 2 baking/cookie sheets with parchment paper and transfer the scones to them. Place 6 on each sheet, leaving plenty of room around each so the heat can get to them evenly and they can rise.

You will want to bake them for about 20 min OR until nicely browned and firm to the touch. It also helps to alternate the pans halfway during baking if you don't have a convection oven.
You should be really proud of yourself so now saddle up to one of these gut busters with a cup of your favorite joe or tea. Enjoy the feeling of England for a bit before reality sets in that you really AREN'T in England. By the way, these scones don't keep very well and should be eaten fresh the same day. Hopefully that won't be a problem for you. Just consider it your goal for the day...eat 12 scones. If you are the 1% that DOESN'T finish them all you can retoast them in the oven the next morning at 350 degrees for about 10 min. It revives them a bit.
 This is dedicated to my friend, Marlene who has faithfully supported me all these years by eating AND complimenting my scones!
THANKS, MARLENE!
 This is dedicated to my friend, Marlene who has faithfully supported me all these years by eating AND complimenting my scones!
THANKS, MARLENE!

These look amazing! Not that I really need to eat something like this, but I'll probably have to make these! : ) Oh, and love the new look of your blog!!
ReplyDeleteOK, so that last comment was from me...apparently I was still logged onto the school's lsac account and didn't know it! Ooops! : ) Cyndi
ReplyDelete